• For more information on how to avoid pop-up ads and still support SkiTalk click HERE.

Building a truck bed shell

Thread Starter
TS
Doug Briggs

Doug Briggs

"Douche Bag Local"
Industry Insider
SkiTalk Tester
Joined
Nov 9, 2015
Posts
7,550
Location
Breckenridge, CO
I have been working on the shell. Mostly adding stiffeners to the fold up side walls. I'm going to be putting the shell back on the truck to work out a couple details of operation/fit as well as fitting the gasket to the front window.

I will be getting some boards to mount on the ceiling per @pete 's suggestion. The hooks will be angled to allow them to carry their load without deflection and weakening them. I'll also upgrade the attachments to the actual shell by using repair straps as 'chainplates' that will be held in place with hex head bolts. I plan to span 4 joists and use 2 lag screws per joist.

I have a problem with the rear window. The gas struts in place now are 14" but I've restricted the range the window will travel to open so they don't reach their full extension and thus don't keep the window open. I'm considering using similar rated ones (24 lbs) but shorter by an inch or two. The places I've contacted haven't given me definitive answers whether that will work and the formulas I've found are for determining pressure ratings, not lengths. Lengths/dimensions are the given factors used to calculate pressure; I can't find details on changing the dimensions.
 
Thread Starter
TS
Doug Briggs

Doug Briggs

"Douche Bag Local"
Industry Insider
SkiTalk Tester
Joined
Nov 9, 2015
Posts
7,550
Location
Breckenridge, CO
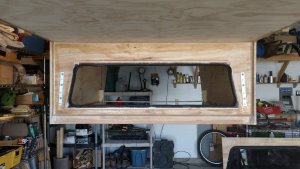
Today I added the frame and gasket to the front of the shell. Pictures to follow. I also tried the pop-up roof and wall function as I had the shell raised and on the truck to fit the gasket.

At this point, apart from adding the chain plates for the tie-downs, it is a matter of sanding, fiberglassing the roof and painting the exterior and interior.
 
Thread Starter
TS
Doug Briggs

Doug Briggs

"Douche Bag Local"
Industry Insider
SkiTalk Tester
Joined
Nov 9, 2015
Posts
7,550
Location
Breckenridge, CO
Go go go go good hands don't choke on the dust.
I'm pretty used to wearing a mask at this point. :rolleyes:

As promised: photos!

IMG_20201008_105149558.jpg IMG_20201008_105153652.jpg
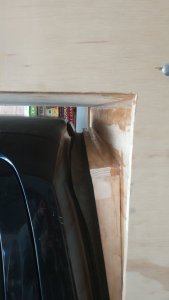
The frame I had to build to accommodate the different spacing and lack of angle on my front wall. I also had to trim the gasket due to the spacing. All in all, it turned out as well as could be expected.

IMG_20201008_105216823.jpg
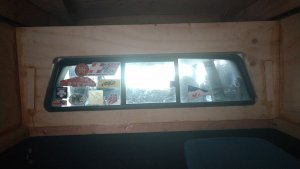
From the inside. I like that I am only adding one layer of glass between me and my rear view.

IMG_20201008_130610682_HDR.jpg IMG_20201008_130621357_HDR.jpg
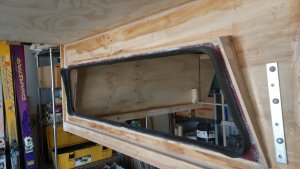
Off the truck. These show the chainplates (sailors will know exactly what I mean) that will be used to hold the shell on the truck. There are plates on the inside, too, so the wall is sandwiched between steel plates and bolted into a single unit. A turnbuckle connects to the inside plate and to the truck's tied down loops.

I've been sanding the bottom edge that contacts the truck bed rails in preparation for saturating the bottom edge with epoxy. That will waterproof the bottom edge, the only place on the body I can't finish while it is on the truck. Today or tomorrow the roof will get unbolted from the body so I can sand and fiberglass it. I'll be putting the roof on saw horses for a good working height, more walk around space than the current location offers and to prevent having to worry about fiberglassing the roof to the body.

I apologize to my friends hoping for better weather for snow, but nature seems to realize how much I need warm temps to get this project done.

:beercheer:
 
Thread Starter
TS
Doug Briggs

Doug Briggs

"Douche Bag Local"
Industry Insider
SkiTalk Tester
Joined
Nov 9, 2015
Posts
7,550
Location
Breckenridge, CO
The project has taken a slight change of plans as cooler weather has come into town. I got fast hardener to compensate. It works in a cooler range, down to 40°F. Unfortunately it begins to gel much faster than I am comfortable working with. I'm not experienced enough in working with fiberglass to work quickly enough to beat the gel. So...

I bought more slow hardener which works down to 60°F. It will actually finish curing down to 50°F, from experience, but you need a fair amount of time warmer than that. I am borrowing a friend's shop heater to heat the garage so that when the slow hardener arrives, I can work on fiberglassing the roof in the fairly large sections that I have planned; 3 yards by 34 inches (twice) and a smaller 1 foot by 68 inch section. The slow hardener will give me plenty of time to prime the unfinished wood, lay down another layer to begin saturating the glass and a third over the glass to finish it. If I were to do this with the fast epoxy, I'd have to work in much smaller pieces, deal with many more seams and run the very serious risk of botching up the job.

In the meantime, I'll be priming and painting the body of the shell and determining whether the Seattle Gray is going to satisfy.
 
Thread Starter
TS
Doug Briggs

Doug Briggs

"Douche Bag Local"
Industry Insider
SkiTalk Tester
Joined
Nov 9, 2015
Posts
7,550
Location
Breckenridge, CO
While on hiatus from painting and working from epoxy/fiberglass due to weather, I did some work on my pully system.

I added the two visible boards to allow me to align the pulleys directly over the attachment points and more importantly, set the hooks into them at 45° so that when under load the forces are directly along the shaft of the hook so not to put bending forces on the shaft. I'm going to change the attachment to the shell and add static cables that will be backups to the lifting cables. The static cables will attach to the same boards but with completely independent hardware at both the ceiling and the shell.

IMG_20201017_181917785.jpg
IMG_20201017_181716114.jpg


I'll probably prime the body of the shell tomorrow and maybe do some small bits of fiberglass work. Glassing the roof awaits the arrival of slow cure hardener and will be possible with the workshop heater I'm borrowing.
 
Thread Starter
TS
Doug Briggs

Doug Briggs

"Douche Bag Local"
Industry Insider
SkiTalk Tester
Joined
Nov 9, 2015
Posts
7,550
Location
Breckenridge, CO
I upgraded the pulley attachment that carries the entire load. The 'extra' holes are from finding that I was probably hitting a nail. So I changed the lag screw locations. The eye is a bolt, not a screw, and is at 45° to the wall so the forces are inline.

Thanks @pete for wising me up. You may have saved my shell. None of the hooks I replaced were bent, but the single hook I replaced with the eye actually had play in the hole. Wow. The eye is rated for 1200 pounds, the shackle 1000 and the pulley 480. 'All systems are go' as far as I can tell. I am thinking about adding another lag screw in the upper right corner. The nice thing about the top inch and a half of the wall is that it provides access to the plate so there are no restrictions in lateral placement.

IMG_20201020_142115726.jpg
IMG_20201020_142109759.jpg

Testing of the system has resumed by lifting the shell half an inch off the floor supports.
 

oldschoolskier

Making fresh tracks
Skier
Joined
Dec 6, 2015
Posts
4,284
Location
Ontario Canada
Hook opening to the inside a as you’ve done it can lead to pulley coming off under load should anything give, face the openings out.

I would not trust lag screws, through bolt with a washer at the end. Allows for give but not pull through or worse pull out.

Finally your pulley to direct the cable down is under rated (last photo), just for sake of argument, you could easily drive cab wt over 480 pounds. I would bump up that one pulley to 1000lbs (split to the 4 corners of the cab 250lbs each vs only 120lbs each).

Having done stuff like this before, change the wood to steel or aluminum, that little extra $ here just ensures proper mounting and ensures you don’t loose a shell, damage the truck or worse get injured and lose a year or 2 skiing.

Stay safe.
 
Last edited:

oldschoolskier

Making fresh tracks
Skier
Joined
Dec 6, 2015
Posts
4,284
Location
Ontario Canada
Hook opening to the inside a as you’ve done it can lead to pulley coming off under load should anything give, face the openings out.

I would not trust lag screws, through bolt with a washer at the end. Allows for give but not pull through or worse pull out.

Finally your pulley to direct the cable down is under rated (last photo), just for sake of argument, you could easily drive cab wt over 480 pounds. I would bump up that one pulley to 1000lbs (split to the 4 corners of the cab 250lbs each vs only 120lbs each).

Having done stuff like this before, change the wood to steel or aluminum, that little extra $ here just ensures proper mounting and ensures you don’t loose a shell, damage the truck or worse get injured and lose a year or 2 skiing.

Stay safe.
I forgot to add, been there, survived that :geek::doh::nono:, never ever doing that again. Who says you need an engineering degree to understand these concepts (and shamefully I have one).
 
Thread Starter
TS
Doug Briggs

Doug Briggs

"Douche Bag Local"
Industry Insider
SkiTalk Tester
Joined
Nov 9, 2015
Posts
7,550
Location
Breckenridge, CO
@oldschoolskier , thanks for your advice. It is duly noted.

I primed the body and fiberglassed the roof. The fiberglassing was greatly anticipated yet approached with trepidation. I have never done glass work other than failed repairs on a kayak.

I started to learn fiberglass work a couple weeks ago when I applied stiffened epoxy to the inside joints of the roof and body followed by glass after the filleting the joints. I had also already glassed the front and back ends of the roof; they were small sections compared to the roof proper. As my initial glass work seemed solid (pun intended), I ordered the slow cure hardener and waited (pun again) for it to arrive. The waiting coincided with cooler temps that are now a bit warmer. The fast cure would have required me to work in smaller sections as my inexperience requires more time and attention to get things right.

Using slow cure allowed me to wet out the wood, effectively priming it using a roller, put down some more epoxy, then lay the glass in a 38" by 3' section, with one edge along the centerline. This was followed by a coat of epoxy on the glass to thoroughly wet out the glass. While the first 3' section was starting to cure, I moved to the other side and repeated the process overlapping the fabric an inch. I finished with a 14" section across the back of the roof. After the roof was completely covered I waited until the epoxy began to gel and rolled on another coat of epoxy. This coat will eliminate 90% or more of the fabric telltales. One more coat tomorrow, as I don't have warmth guaranteed for a proper cure if I add that final coat now.

It is far from perfect, but whereas I do have some areas that are slightly higher than the rest, there are no air bubbles. I utilized a very thin foam roller for applying the epoxy, my gloved hand to move the fabric around and work out most folds and bubble, then a finned roller to work out the rest. The patterning of the wood didn't help in identifying all bubbles and epoxy coverage. All in all, though, I'm pleased with how it came out.

IMG_20201022_100611468.jpg

The first large section.

IMG_20201022_152838428.jpg

All glassed up.

Next up: final coats of paint, some hardware to be installed then showin' her off!
 

oldschoolskier

Making fresh tracks
Skier
Joined
Dec 6, 2015
Posts
4,284
Location
Ontario Canada
Do a slight wet sand to smooth out and depending on the epoxy (polyester or epoxy resin) Spar Varnish for that final finish. (Sorry can’t remember with which one its important).

Looks good. :golfclap:
 
Thread Starter
TS
Doug Briggs

Doug Briggs

"Douche Bag Local"
Industry Insider
SkiTalk Tester
Joined
Nov 9, 2015
Posts
7,550
Location
Breckenridge, CO
@oldschoolskier , thanks. My plan on the fiberglass is to lightly sand and then instead of using a roller, try using a squeegee to apply the final coat of epoxy. I think the epoxy wasn't getting uniformly applied on the last coat. It is then getting some white EzPoxy Polyurethane Topside Paint. It won't be perfect to look at but it will be functional.
 
Thread Starter
TS
Doug Briggs

Doug Briggs

"Douche Bag Local"
Industry Insider
SkiTalk Tester
Joined
Nov 9, 2015
Posts
7,550
Location
Breckenridge, CO
Today was a landmark day. The beginning of the end.

I put on one coat of paint and have to say: I like it! I was unsure about the tint of the Seattle Gray, but rather than having a green hue which some grays have (and the paint chip suggested), it tends to blue. So... Score!

I wish I could put the second coat on today, but I need 24 hours before that and by then it'll be tooooo cold. My next window arrives at the end of the week so I'll have it all sanded out to get a quick coat done.

IMG_20201024_082002978.jpg

After the second over coat of epoxy cured.

IMG_20201024_104328975.jpg

Taped and the roof mostly painted. The body is still just primer.

IMG_20201024_124601083.jpg

All painted (roof and body) and tape removed. I still need to urethane the natural wood 'stripe'; it is currently fully glassed and sanded in preparation for painting.

There has been one point of concern for me that I have delayed making a final decision on. As I built the bottom rail of the shell out of a 2x3 rather than steel angle or some thinner material, I can't use conventional shell clamps to hold it to the rail. I added 'chainplates' to allow me to connect the shell to the bed's steel hold down strap loops but have felt that the rear chainplates at least may not be strong enough due to the awkward position of them to fit the loops. So I have decided to simply drill through the 2x3s and the rails on the bed, place steel backing plates (steel straps) on top of the shell rail and under the bed rail and bolt it all up. I'll use 3 bolts per rail for a total of 6 bolts. They'll be equally spaced along the 5 foot rail so a little under 2½ feet apart. They'll be Grade 5 or better. I'm thinking probably 5/16" unless anyone has other suggestions.

1603576378743.png

credit: boltdepot.com

My calculations for strength are based on 100 mph wind speed. I believe that a sideways gust from a passing semi trailer is likely to generate that.

P (pounds per square foot) = 0.00256 x V²​
P = 0.00256 x (100²)​
P = 25.6 psf​

Generously my side walls are 4x10 sheets of plywood (a bit less, but I'm rounding up) so 40 sf (square feet).

40 sf x 25.6 psf = 1024 pounds on a side wall at 100 mph​
What I'm not sure about is how to convert that pressure into a unit that will correlate to the strength of bolts that will be necessary. Any help here would be appreciated. @pete , @oldschoolskier ?
 

oldschoolskier

Making fresh tracks
Skier
Joined
Dec 6, 2015
Posts
4,284
Location
Ontario Canada
There is an app called iEngineer that gives most bolt specs (iPhone not sure for other devices). Personally I would go heavier 7/16 if only 3 per side.

You are dealing with several issues in holding the cab in place. Sort of like binding except you don’t want release. The hidden factors are vibrations and bumps and long term metal fatigue in the bolts.

I think the biggest issue will be the weight of the cab during a sudden movement (ie stop, bump etc). These forces can be significantly higher than the wind load.

Think how big the bolts holding on the pickup bed are.

Consider it a factor of safety.
 
Last edited:
Thread Starter
TS
Doug Briggs

Doug Briggs

"Douche Bag Local"
Industry Insider
SkiTalk Tester
Joined
Nov 9, 2015
Posts
7,550
Location
Breckenridge, CO
I got 3/8 grade 8 bolts, nuts and washers. I'm going to make a sandwich of steel with bolts passing through my steel top and bottom while also through the truck bed rails. The trickiest part will be to drill at the right angle to pass through the layers. I'm going to build a jig (basically predrill a piece of wood that I can use as a guide for the angle) and test it on scrap before I do the real drilling on the truck and shell.

Soooo close. At 39° F right now (2 PM MST), I'm deferring until tomorrow to resume work. Th, F, M and T are going to be 50+° so I'm aiming to work and finish on those days. Hardware will go on (and maybe off depending on where I am with the paint) over the weekend. I'll still have the pop-up walls to finish as well as the interior urethane which can wait, but it will be street ready, I hope, no later than Tuesday next week.

IMG_20201025_145250991.jpg

I'm still very happy with the color of the body and the 'boot' stripe. Thanks @cantunamunch . The stripe has gotten a lot of compliments.
 
Thread Starter
TS
Doug Briggs

Doug Briggs

"Douche Bag Local"
Industry Insider
SkiTalk Tester
Joined
Nov 9, 2015
Posts
7,550
Location
Breckenridge, CO
I got the new gas struts in. They work like a charm. The 14 inch ones weren't long enough. 15 inch are.

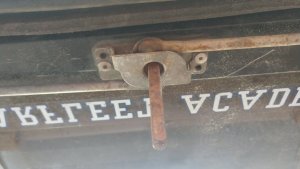
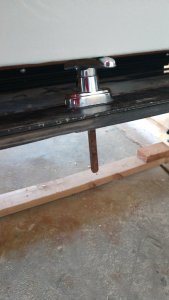
Can anyone tell me why I shouldn't shorten this excessively long rod that is how the handle connects to the arms that lock the window? Why was it so long in the first place?

IMG_20201028_151040931.jpg IMG_20201028_151029486.jpg
I'd like to leave about half an inch.
 

Rich McP

H20nSnow Elsewhere
Skier
SkiTalk Supporter
Joined
Dec 21, 2015
Posts
431
Location
Breck whenever possible
I got the new gas struts in. They work like a charm. The 14 inch ones weren't long enough. 15 inch are.

Can anyone tell me why I shouldn't shorten this excessively long rod that is how the handle connects to the arms that lock the window? Why was it so long in the first place?

View attachment 113462 View attachment 113463
I'd like to leave about half an inch.
No reason not to shorten it. You putting a handle on the inside? (The only good answer to that is yes)
 
Thread Starter
TS
Doug Briggs

Doug Briggs

"Douche Bag Local"
Industry Insider
SkiTalk Tester
Joined
Nov 9, 2015
Posts
7,550
Location
Breckenridge, CO
No reason not to shorten it. You putting a handle on the inside? (The only good answer to that is yes)
That'd be a good idea although it isn't too hard to simply turn the levers that connect the rods to make it operate.

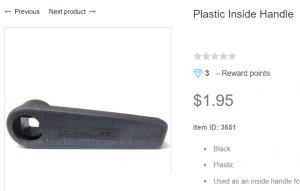
Yup, I think I can swing this:

1603925336535.png
 
Last edited:
Thread Starter
TS
Doug Briggs

Doug Briggs

"Douche Bag Local"
Industry Insider
SkiTalk Tester
Joined
Nov 9, 2015
Posts
7,550
Location
Breckenridge, CO
Well, the day had to come. I completed the shell. The interior needs some finishing and continued design and fabrication, but the shell is on the truck and ready to deal with weather.

The attachment to the truck turned out well. I was nervous drilling through the truck bed rails, but with a jig purpose built for the process, I succeeded quite satisfactorily.

IMG_20201030_184353955.jpg


IMG_20201030_184413062.jpg

I first glassed the rail of the shell and laid a 1 1/4" wide strap of 1/8" steel on top of that. The rail had been sanded to provide an 8° bevel. I drilled the holes at 8° to allow the bolt to penetrate the truck bed rail near the center. The bevel on the wood rail allowed the bolt to sit flat. I also created 8° wedges of wood with more 1/8" steel for the underside of the bed rail. So I ended up with a sandwich of washer, steel, wood, truck rail, wood, steel, washer. With the bevels applied, the bolt heads and nuts were square to the material being sandwiched.

IMG_1838.JPG

Three bolts per rail plus the chainplates and turnbuckles I had originally planned to use add a fourth point of attachment on each side.

IMG_1828.JPG


IMG_1832.JPG


IMG_1835.JPG


IMG_1837.JPG

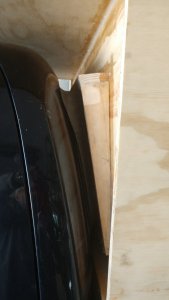
The vertical ribs on the rear wall are to stiffen the 1/2" plywood in anticipation of cutting out an opening and using plexiglass to add an awning style window. It will lighten the wall considerably and reduce the lifting forces required to pop the top.

Popping the top is really easy. I use my legs to lift the roof and the rear wall drops (it is hinged at the top edge) providing a predictable support so that I can change my position to finish raising the roof and dropping the slot on the bottom of the wall onto the 'tongue' shaped into the top edge of the body. Then I just lift each wall up and boom. Instant standing headroom. It takes maybe 15 seconds to do all the lifting. The bottom edge of the walls works in a similar tongue and groove fashion as the rear wall.

I need to add another hinge on one wall to deal with the 1/4" plywood warp. The wood was warped when I received it and nothing I did could remove it. I'll also have some simple latches to hold the top edge tight against the roof overhang.

IMG_1842.JPG


My berth will be diagonally above the cab with a 2 foot extension adding the required length.

I used V-Seal to add weatherstripping to the joint between the roof and body. All the through bolts and hardware were bedded in 30 year caulk. There are 3 latches per side to hold the roof down which also add substantial rigidity to the entire assembly.

A second set of cables has been added to the roof hanging system. They are static and completely independent of the dynamic lifting system. They do share the same 2 x 6s that are lag screwed to the ceiling, but are of 1/4 cable using separate hooks and points of connection to the shell. They allow the dynamic system to offload most of the weigh to the static system. Despite some parts being lag screwed, I'm very comfortable with the overall strength and redundancy I have built in.

I am quite happy with the outcome and look forward to putting it to use. I hope you have enjoyed following my journey. It was stressful at times when I had to work against the clock with the epoxy, redesign the shell/truck attachment system. I lost some sleep but I also had a project that I have been planning for years to work on. I immersed myself in the work each day and enjoyed relearning/learning techniques with hand tools. Developing strategies and schedules for the work gave me focus away from the world around me which I found quite cathartic.

I'll post some more photos as I tie up the loose ends I need to deal with on the interior. Thanks to everyone for their comments and support.
 

Sponsor

Staff online

Top