With so many car buffs on this site, I thought I would go through the steps of a typical interior/exterior detail of mine with tips for more basic details along the way. I'm a mobile detailer, so I show up at the person's house with all my gear and only require a water hose outlet and hydro to do my thing. I have a 2018 Mini JCW 3 Door Hatchback(which basically a box) so it stores a surprising amount of gear when packed properly. This is my gear unloaded at the customer's house to start the day which is 9am most days.

I always start with the interior detail in the driveway for better lighting and carpet drying with a move inside the garage after washing to polish and coat the exterior. I first remove the floor mats out of the car along with any garbage and give the interior a vac(floor mats outside of the car if they are carpet). I use a Rigid(Home Depot) vac but a similar Shop vac would be fine too. I have an assortment of hose ends for the vac with the rubber straw-like VaccUFlex one being great for hard to reach places. I also use various brushes to loosen dirt(dimpled rubber gloves de-static pet hair and scrapper for salt stains) before vacuuming. I usually vac an area and then hit with a brush of some kind to loosen any remaining dirt or hair(like in the seat crevices and cup holders).
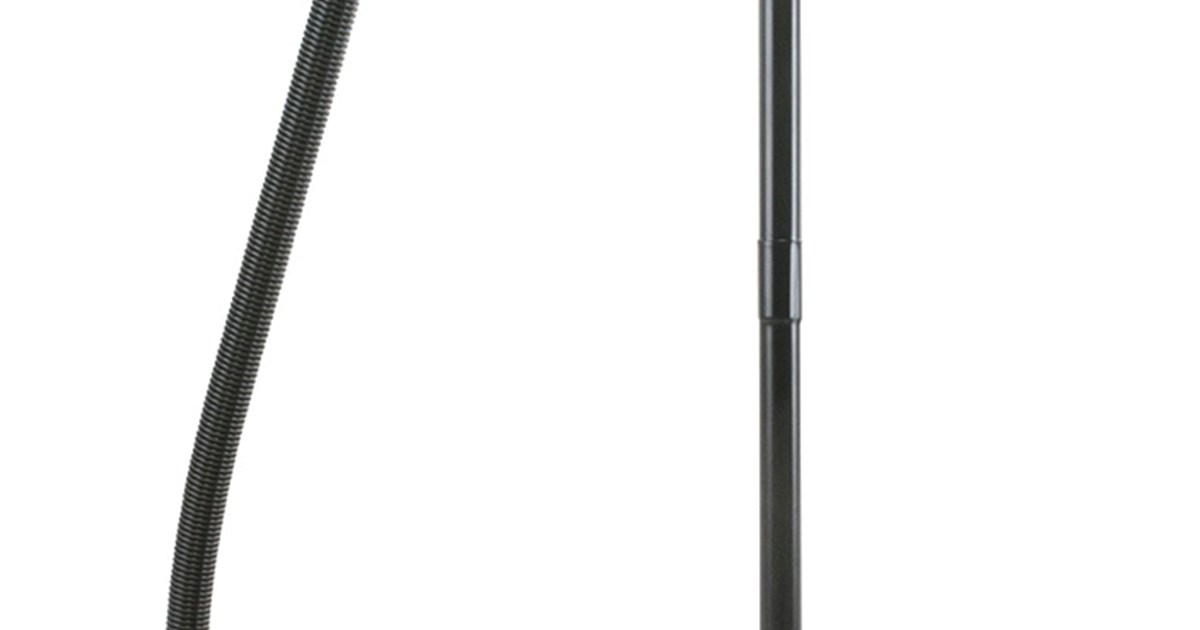
Vac and assorted interior brushes

Once the interior and carpet mats are done, I then use my heated carpet extractor which shoots heated water into the carpet like an mini power washer and sucks up the dirty water. I pre-treat dirty areas(driver floor and pedals, cup holders and floor mats) with a degreaser like Simple Green first while the extractor heats up and go over those areas with a brush. A dedicated salt spray or 1/2 vinegar and water mix to pretreat salt stains followed by HOT water to dissolve. A wet vac could be used or a Bissel Green Machine is even better for doing carpets and seats with it's built in spray. Again the flexible hose is used on the extractor for sucking up water in hard to reach spots.
Heated portable extractor

After the carpets are dry and wet cleaned where needed, I then start on all the interior surfaces and leather/vinyl seats. I use all the same brushes in the vacuuming steps in this step along with a Magic eraser and a lint free microfibre cloth. I then 1/2 fill up a bucket with just water and then another pail with a mix of water(70%) and Leather & vinyl cleaner/conditioner(30%). I use an Optimum Protectant Plus for this but there are lots of great ones out there.

All My brushes and Magic Eraser I put in the "rinse" bucket of just water and then dip the brushes into the conditioner mix before going over the various surfaces. The brushes and cloth are rinsed in the plain water pail and then dipped into the "mixed" pail after every use.
Lightly brush the various crevices in the dash, doors, seats with your brushes dipped in the mixed water and then wipe over those areas with the microfibre cloth(that is also dipped and then wrung).
I usually start with the vents which I will sometimes lightly spray in some conditioner or even tire foam if they are really dusty, use a vent brush(or paint brush) and then wipe with your cloth. I then hit the vents with a leaf blower or compressed air to move any standing water and again wipe with the cloth.
The biggest thing with interiors is to be sure to hit all the panel gaps, seat stitching etc with a wet brush before wiping down. Don't be afraid to get leather seats and door panels wet as they are easily wiped dry with your cloth. A pretreat of degreaser can be used on dirty door handles or leather seats before hitting with a brush and the Magic Erasers are great for shoe scuff marks on plastic door sills.
After all the interior has been gone over, I then hit the interior glass if the doors windows have frames(frameless I'll wait till I do the exterior). I use 2 glass specific towels with one fairly damp and follow with the second one more lightly misted with an ammonia free window Cleaner like Invisible Glass. I first lower the widows down 1/3 so I can wipe the very top of all the windows. Then I go over the sunroof, vanity and main windows and gauges with the two cloths but find some touch screens clean better with a traditional plush microfibre sprayed lightly with the glass cleaner.
Most cars take me about 3 hours to do all the above steps and it's about 4 hours on a mid size SUV.
As far as "game changer" tools go for even a DIY detailer, a power washer, a leaf blower/dryer and random orbital polisher have to be the top choices on an exterior. I have to always show up to customers homes with a clean car so my car is cleaned every single night when I come home from work. With a power washer permanently attached to a garage hose and a 12amp leaf blower, an exterior wash and dry takes me less than 15 mins. Spray with power washer, leaf blower almost all the water off and then mist the car and a microfibre cloth with Instant Detailer spray and wipe dry.
With a customers exterior, I will start with cleaning the rubber floor mats with my power washer, degreaser spray(and sometimes some Vim) and hit with brush. Rinse with power washer, spray off standing water with leaf blower and dry any remaining water with a cloth. Next I hit the engine bay. With modern engines covered in plastic covers, the water risk of hitting sensitive areas has been hugely reduced. I make sure all caps are tight within the engine bay and spray degreaser or Rust Proof Removal spray on really oily areas or oil guard overspray. I go over the hood and engine with the power washer to rinse off and then dry off any standing water with the leaf blower. Then I spray tire foam over the engines plastic and rubber hoses avoiding any belts and again use the leaf blower to remove any standing foam or water. Wipe any uneven remaining spray with a microfibre(will use the same cloth on wheels later) and you're done. Modern engines take about 2 mins to do and sometimes get the biggest reaction of the day from customers. lol
I then use the power washer on the exterior starting with the front of the car and work my way around the vehicle. Once you work back around to the front again, the soaked bug marks are easier to remove. I usually open the doors and spray the very bottom of the door frames and the side of the door sills being careful not to spray the interior.
Very dirty vehicles can be foamed to loosen dirt or I will sometimes spray degreaser or tar removers on areas that are visibly dirty. 2 Buckets of water are filled, one being the rinse bucket and the other being the car soap wash bucket. Since I'm trying to remove any remaining wax off the vehicle, I use dish detergent in my wash bucket but for regular maintenance washes, use the milder car soap. I start with the front of the vehicle with a bug sponge (if there are any remaining) and then use a plush wash mitt for the rest of the car. Use your mitt dipped into the soapy water over the roof and work your way down from there. I do the bottom of the doors(especially behind the front wheel) very last and usually with a separate mitt dedicated for that as it will be the dirties area of the car. I hit one panel at a time with the soapy mitt and then power wash the mitt clean, a quick rinse in the clear water bucket and then into the soapy water again for the next panel. You always want to make sure the mitt is grit free before hitting the car again and many wash buckets have "grit guards" to make sure the grit stays below where the mitt can reach. After I initially go over the vehicle, it's very common to see lots of tiny orange oxidation spots on the sides and back. These are caused by the "semi metallic" brake pads sending out a metallic dust when braking and this dust latches onto the paint and oxidizes. Heavier SUVs and Teslas usually have very metallic brake pads and oxidation spots show up more on lighter colours. A clay bar will get this off with lots of work but the dedicated iron removers work much quicker and easier. Once I have washed and removed all oxidation spots on the entire vehicle, I rinse it off and then leaf blower and towel dry to prevent water spots.
Similar to the interior, wheels are all about brushes. I spray degreaser on the wheels, callipers and wheel wells then use all the various brushes dipped in the soapy water bucket to loosen the dirt. Iron remover is again used to pretreat the wheels when you can see orange dust on them. Rinse with the power washer and leaf blower to dry them off.
I then use a ultra fine 0000 steel wool on the exhaust tips to remove soot.
Wheel brushes

The car is then pulled into the garage where I will lube the surface with instant detailer and use a clay bar to remove any remaining contaminates on the paint and exterior windows. After drying the car, I will tape off any rubber or plastic trim to protect the from buffer damage and to quicken cleanup.
With most cars I am doing 1 step of machine(random orbital) applied compound polish with a second step of finishing wax(mild polish with wax) or a finishing polish if I'm ceramic coating the car. Foggy headlights or deeper scratches may get hit with wet sandpaper first followed by a more aggressive compound on a rotary polisher.
Todays compound/polishes combined with higher quality foam pads and random orbital machines make it much safer for beginners at home as well as saving time for pros. You can now get better results in 2 steps than you could in 3 steps of polishing 20 years ago.
A foam cutting pad is used with the compound polish and then a less aggressive polishing pad is used with the milder finishing wax or polish.
Towel, wash mitts, buffing pads, various polishes and Rotary(top) and random orbital buffers.

Clay bar, Compound/polish, final wax and polish and ceramic coating with their application pads.

After the car receives it's second coat of polish, the tape is removed from the trim and I take the car outside for a power wash to remove all the compound dust from polishing and back inside after leaf blowing dry. Now I wipe down the door jams, dress the tires, lower trim and wheel wells with long lasting oil based tire shine and clean the exterior windows. Water spots on the windows received a water spot remover or they get hit with 3000 grit wet sand paper to clear. Final wipe down with a microfibre and I'm done for the day. If I'm applying ceramic coating I would do now.
Total time is about 7-8 hours for a car and 8-9 hours for an SUV. Add another 45 mins for ceramic coating at the end of the day.
Any questions about the process or life in general, let me know!
Greg
I always start with the interior detail in the driveway for better lighting and carpet drying with a move inside the garage after washing to polish and coat the exterior. I first remove the floor mats out of the car along with any garbage and give the interior a vac(floor mats outside of the car if they are carpet). I use a Rigid(Home Depot) vac but a similar Shop vac would be fine too. I have an assortment of hose ends for the vac with the rubber straw-like VaccUFlex one being great for hard to reach places. I also use various brushes to loosen dirt(dimpled rubber gloves de-static pet hair and scrapper for salt stains) before vacuuming. I usually vac an area and then hit with a brush of some kind to loosen any remaining dirt or hair(like in the seat crevices and cup holders).
Vac and assorted interior brushes
Once the interior and carpet mats are done, I then use my heated carpet extractor which shoots heated water into the carpet like an mini power washer and sucks up the dirty water. I pre-treat dirty areas(driver floor and pedals, cup holders and floor mats) with a degreaser like Simple Green first while the extractor heats up and go over those areas with a brush. A dedicated salt spray or 1/2 vinegar and water mix to pretreat salt stains followed by HOT water to dissolve. A wet vac could be used or a Bissel Green Machine is even better for doing carpets and seats with it's built in spray. Again the flexible hose is used on the extractor for sucking up water in hard to reach spots.
Heated portable extractor
After the carpets are dry and wet cleaned where needed, I then start on all the interior surfaces and leather/vinyl seats. I use all the same brushes in the vacuuming steps in this step along with a Magic eraser and a lint free microfibre cloth. I then 1/2 fill up a bucket with just water and then another pail with a mix of water(70%) and Leather & vinyl cleaner/conditioner(30%). I use an Optimum Protectant Plus for this but there are lots of great ones out there.
All My brushes and Magic Eraser I put in the "rinse" bucket of just water and then dip the brushes into the conditioner mix before going over the various surfaces. The brushes and cloth are rinsed in the plain water pail and then dipped into the "mixed" pail after every use.
Lightly brush the various crevices in the dash, doors, seats with your brushes dipped in the mixed water and then wipe over those areas with the microfibre cloth(that is also dipped and then wrung).
I usually start with the vents which I will sometimes lightly spray in some conditioner or even tire foam if they are really dusty, use a vent brush(or paint brush) and then wipe with your cloth. I then hit the vents with a leaf blower or compressed air to move any standing water and again wipe with the cloth.
The biggest thing with interiors is to be sure to hit all the panel gaps, seat stitching etc with a wet brush before wiping down. Don't be afraid to get leather seats and door panels wet as they are easily wiped dry with your cloth. A pretreat of degreaser can be used on dirty door handles or leather seats before hitting with a brush and the Magic Erasers are great for shoe scuff marks on plastic door sills.
After all the interior has been gone over, I then hit the interior glass if the doors windows have frames(frameless I'll wait till I do the exterior). I use 2 glass specific towels with one fairly damp and follow with the second one more lightly misted with an ammonia free window Cleaner like Invisible Glass. I first lower the widows down 1/3 so I can wipe the very top of all the windows. Then I go over the sunroof, vanity and main windows and gauges with the two cloths but find some touch screens clean better with a traditional plush microfibre sprayed lightly with the glass cleaner.
Most cars take me about 3 hours to do all the above steps and it's about 4 hours on a mid size SUV.
As far as "game changer" tools go for even a DIY detailer, a power washer, a leaf blower/dryer and random orbital polisher have to be the top choices on an exterior. I have to always show up to customers homes with a clean car so my car is cleaned every single night when I come home from work. With a power washer permanently attached to a garage hose and a 12amp leaf blower, an exterior wash and dry takes me less than 15 mins. Spray with power washer, leaf blower almost all the water off and then mist the car and a microfibre cloth with Instant Detailer spray and wipe dry.
With a customers exterior, I will start with cleaning the rubber floor mats with my power washer, degreaser spray(and sometimes some Vim) and hit with brush. Rinse with power washer, spray off standing water with leaf blower and dry any remaining water with a cloth. Next I hit the engine bay. With modern engines covered in plastic covers, the water risk of hitting sensitive areas has been hugely reduced. I make sure all caps are tight within the engine bay and spray degreaser or Rust Proof Removal spray on really oily areas or oil guard overspray. I go over the hood and engine with the power washer to rinse off and then dry off any standing water with the leaf blower. Then I spray tire foam over the engines plastic and rubber hoses avoiding any belts and again use the leaf blower to remove any standing foam or water. Wipe any uneven remaining spray with a microfibre(will use the same cloth on wheels later) and you're done. Modern engines take about 2 mins to do and sometimes get the biggest reaction of the day from customers. lol
I then use the power washer on the exterior starting with the front of the car and work my way around the vehicle. Once you work back around to the front again, the soaked bug marks are easier to remove. I usually open the doors and spray the very bottom of the door frames and the side of the door sills being careful not to spray the interior.
Very dirty vehicles can be foamed to loosen dirt or I will sometimes spray degreaser or tar removers on areas that are visibly dirty. 2 Buckets of water are filled, one being the rinse bucket and the other being the car soap wash bucket. Since I'm trying to remove any remaining wax off the vehicle, I use dish detergent in my wash bucket but for regular maintenance washes, use the milder car soap. I start with the front of the vehicle with a bug sponge (if there are any remaining) and then use a plush wash mitt for the rest of the car. Use your mitt dipped into the soapy water over the roof and work your way down from there. I do the bottom of the doors(especially behind the front wheel) very last and usually with a separate mitt dedicated for that as it will be the dirties area of the car. I hit one panel at a time with the soapy mitt and then power wash the mitt clean, a quick rinse in the clear water bucket and then into the soapy water again for the next panel. You always want to make sure the mitt is grit free before hitting the car again and many wash buckets have "grit guards" to make sure the grit stays below where the mitt can reach. After I initially go over the vehicle, it's very common to see lots of tiny orange oxidation spots on the sides and back. These are caused by the "semi metallic" brake pads sending out a metallic dust when braking and this dust latches onto the paint and oxidizes. Heavier SUVs and Teslas usually have very metallic brake pads and oxidation spots show up more on lighter colours. A clay bar will get this off with lots of work but the dedicated iron removers work much quicker and easier. Once I have washed and removed all oxidation spots on the entire vehicle, I rinse it off and then leaf blower and towel dry to prevent water spots.
Similar to the interior, wheels are all about brushes. I spray degreaser on the wheels, callipers and wheel wells then use all the various brushes dipped in the soapy water bucket to loosen the dirt. Iron remover is again used to pretreat the wheels when you can see orange dust on them. Rinse with the power washer and leaf blower to dry them off.
I then use a ultra fine 0000 steel wool on the exhaust tips to remove soot.
Wheel brushes
The car is then pulled into the garage where I will lube the surface with instant detailer and use a clay bar to remove any remaining contaminates on the paint and exterior windows. After drying the car, I will tape off any rubber or plastic trim to protect the from buffer damage and to quicken cleanup.
With most cars I am doing 1 step of machine(random orbital) applied compound polish with a second step of finishing wax(mild polish with wax) or a finishing polish if I'm ceramic coating the car. Foggy headlights or deeper scratches may get hit with wet sandpaper first followed by a more aggressive compound on a rotary polisher.
Todays compound/polishes combined with higher quality foam pads and random orbital machines make it much safer for beginners at home as well as saving time for pros. You can now get better results in 2 steps than you could in 3 steps of polishing 20 years ago.
A foam cutting pad is used with the compound polish and then a less aggressive polishing pad is used with the milder finishing wax or polish.
Towel, wash mitts, buffing pads, various polishes and Rotary(top) and random orbital buffers.
Clay bar, Compound/polish, final wax and polish and ceramic coating with their application pads.
After the car receives it's second coat of polish, the tape is removed from the trim and I take the car outside for a power wash to remove all the compound dust from polishing and back inside after leaf blowing dry. Now I wipe down the door jams, dress the tires, lower trim and wheel wells with long lasting oil based tire shine and clean the exterior windows. Water spots on the windows received a water spot remover or they get hit with 3000 grit wet sand paper to clear. Final wipe down with a microfibre and I'm done for the day. If I'm applying ceramic coating I would do now.
Total time is about 7-8 hours for a car and 8-9 hours for an SUV. Add another 45 mins for ceramic coating at the end of the day.
Any questions about the process or life in general, let me know!
Greg
Last edited:
")
