• For more information on how to avoid pop-up ads and still support SkiTalk click HERE.

Mounting Bindings with Paper Templates

Spam16v

Zac
Skier
Joined
Jun 10, 2021
Posts
65
Location
WNY
2A4CBB31-0FFF-459D-9E5D-08359411F731.jpeg
549817FA-3F4F-4911-A100-C77F70752DD8.jpeg


They do look pretty nice. I snagged them from The Sports Basement on sale for $179. Hesitated & ordered one pair, immediately regretted not ordering two pair and were gone 2 minutes later. Wanted the “raw” color but I’m glad they only had gold.
@Spam16v, the Gold Pivots look sweet on the Blade.
 
Thread Starter
TS
T

tomahawkins

Making fresh tracks
Skier
SkiTalk Supporter
Joined
Dec 3, 2019
Posts
1,837
Location
Bellingham, WA
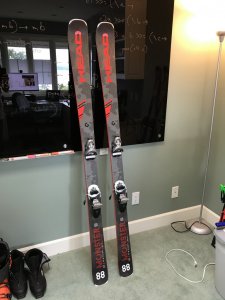
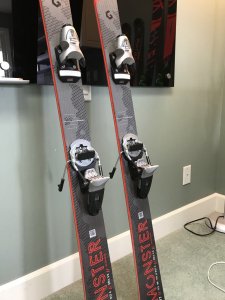
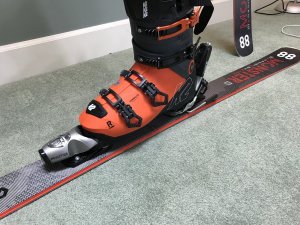
My latest install. The last new 2020 M88 I could find in my size. The silver and black in the topsheet are almost too much of a match for Raw Pivots; the bindings are camouflage.

Maybe we need a Pivot Pics thread.

IMG_5030.jpeg
IMG_5031.jpeg
IMG_5032.jpeg
 

Mark1975

Getting on the lift
Skier
Joined
Dec 2, 2020
Posts
163
Location
New England
Hats off to @tomahawkins for the effort in putting this together. My only comment is to be aware that paper is hygroscopic - it expands /contracts with changes in humidity so putting a reference scale to check for accuracy is a good idea. ( This is why you never scale off of a blueprint if accuracy is important) If you can, print onto Mylar as it’s dimensionally stable and far more durable. This may seem like overkill but skis are expensive and being off by a millimeter is enough to ruin your day.

Just wanted to repeat this.

I use transparency film sheet (the type used for overhead projectors) to either print a template, or create one by hand. I find being able to see through the template really helps me adjust it on the ski correctly vs. a paper template. Plus, they are much more durable than printing on paper. Yeah, more expensive than using printer paper, but for me worth it because I can see the top of the ski through the template. Using the transparent template has saved me from making a big mistake several times.
 

Yo Momma

Making fresh tracks
Skier
Joined
Mar 29, 2016
Posts
1,789
Location
NEK Vermont
FYI this is the process I've used for flawlessly mounting bindings during the past years. I always refer back to these vids. This kid has the process down from A to Z in parts 1 & 2... including the critical finesse part of using a countersink drill bit and I added an auto push button center punch on the crosshairs on the template to center your holes. This is the magic sauce... that and using the proper Wintersteiger 3.6x9mm (wood), 4.1x9mm (skis w/ metal) drill bits from Tognar.com (drill press totally optional, I have access to one but never had to use it. Okay I'm a dentist so keeping the comparatively HUGE drill straight is NO PROBLEM!!! LOL ) allows the binding to be flat on the ski. If you're new to this, practice on wood 1st to get your hands accustomed to the movements. ;


Countersink kit on amazon. I've tried all the sizes in the kit and much prefer using the largest size countersink bit. No need to sink it all the way. Just a little pressure goes a long way if your bit is new and sharp:
I also use Roo Glue from Tognar to seal the holes. Top notch stuff! Once you open it, seal the top w/ aluminum foil screwed on under the cap. That way when you finish and put it away, it has an airtight seal and will last for years.
 
Last edited:
Thread Starter
TS
T

tomahawkins

Making fresh tracks
Skier
SkiTalk Supporter
Joined
Dec 3, 2019
Posts
1,837
Location
Bellingham, WA
I always refer back to these vids. This kid has the process down from A to Z in parts 1 & 2...

That's a pretty good process! I think it is a bit more work and not quite as accurate as what I've outlined above, but it still will offer a good mount.

One criticism is buying a ski that only has a midline mark printed on the topsheet. The topsheet is placed in the layup rather arbitrarily and a manufacture who is cutting a corner here is undoubtedly cutting corners elsewhere.

My biggest criticism however is not using a tap to cut clean threads. This will guide the screw in easy and straight and will give you a very clear indication when the screw is starting to seat. If you are cutting threads with the screw as you mount, you largely loose this indication. I've experienced that sinking feeling when I realized I've just strip out a hole in a new pair of skis. It sucks; I don't want anyone to go through that.
 

Yo Momma

Making fresh tracks
Skier
Joined
Mar 29, 2016
Posts
1,789
Location
NEK Vermont
My biggest criticism however is not using a tap to cut clean threads. This will guide the screw in easy and straight and will give you a very clear indication when the screw is starting to seat. If you are cutting threads with the screw as you mount, you largely loose this indication. I've experienced that sinking feeling when I realized I've just strip out a hole in a new pair of skis. It sucks; I don't want anyone to go through that.

Great point! :beercheer: I forgot to mention, I tap the hole w/ one of the screws prior to final insert. Just make sure the screw goes in straight. Works perfect. For the midline totally agree.... Never use a factory line marked in the topsheet. Always measure 4 or 5 x for each marking before drawing the entire midline and use a thin pencil! (Yes... my thick carpenter pencil has pooched a midline or two before I learned that!!LOL) Thanks!
 

Yo Momma

Making fresh tracks
Skier
Joined
Mar 29, 2016
Posts
1,789
Location
NEK Vermont
Just some random mounting pics:
I've always liked Schizos on my wider platforms so I can play w/ the mounting position depending on conditions and the ski characteristics and their relatively small delta. But the J Skis are rocking Look Pivot 14 Forza's for my all time fav binding. The Forza's format just have that "Feel" that can't be replicated by any other binding. Totally worth any potential difficulty in re-entry in deep pow (Moment Wildcats and JSkis Vacation in the pic. Both amazing quality skis. The quality of skis is just off the charts nowadays. Kudos to the industry. )
 

Attachments

  • 20200620_203159.jpg
    20200620_203159.jpg
    81.2 KB · Views: 68
  • 20200622_120614.jpg
    20200622_120614.jpg
    101.8 KB · Views: 64
  • 20201127_103049.jpg
    20201127_103049.jpg
    93.5 KB · Views: 65
Last edited:

Henry

Out on the slopes
Skier
Joined
Sep 7, 2019
Posts
1,245
Location
Traveling in the great Northwest
Does the dentist have the skis upside down and use a mirror to drill from below?

I follow Tom's procedure pretty much but simplified. I mount the bindings on a 2x4 then make a template from some stiff paper, just punching the holes through the paper into the 2x4 holes. I first draw a centerline on the 2x4 and on the paper, and mark a boot sole centerline on both, mount the bindings aligned with these reference lines, than align the template paper with the lines. To find the center I use dividers...estimate the center point, set the other divider point at the ski edge, try the other side of the ski. Adjust the center position and divider width as need, try again. Masking tape on the ski lets me mark the ski's centerline and boot sole mount position in order to align the template. An ordinary center punch with a sharp tip works fine for me to mark the spots to drill.

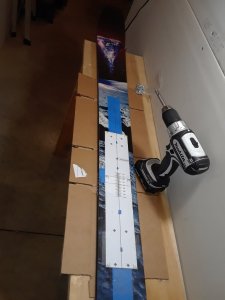
I drill with the binding shoulder drills, then use a countersink to remove any remaining raised burr. Tap the holes with the usual #12AB tap whether the ski material is metal or fiberglass. Even superlight skis like my Head Kore have an aluminum plate in them for secure binding mounting. I use a drop of waterproof yellow carpenter's glue in the screw holes. Use a #3 Pozidriv screwdriver for the screws. Tognar and other vendors have binding screws in various lengths. I have gotten longer screws to use when I put a 1/8" plexiglass shim under the heel bindings to give me the delta I like.
 

Yo Momma

Making fresh tracks
Skier
Joined
Mar 29, 2016
Posts
1,789
Location
NEK Vermont
Does the dentist have the skis upside down and use a mirror to drill from below?

I just have to get used to the sizing!!! Ski drilling is on a MEGA scale compared to my usual working space! I was working on my car w/ a buddy who is also a patient, and handling a screw and he said, "Watch out... Those screws are really small!" Of course my comeback was, " Really?...You're kidding right!?!?!? " :beercheer:
 
Thread Starter
TS
T

tomahawkins

Making fresh tracks
Skier
SkiTalk Supporter
Joined
Dec 3, 2019
Posts
1,837
Location
Bellingham, WA
I added templates for Look R20 plates with variable BSL. Just bolt on your SPX bindings on the center hole, both toe and heel, and your boot midsole should end up on the line or where ever you decide to place it.

I had to reposition some R20s because my son is still in junior race skis, but his BSL is north of 330.


crgildart

Gravity Slave
Skier
Joined
Nov 12, 2015
Posts
16,453
Location
The Bull City
If you're putting bindings on that have the same footprint as others you already have mounted, same BSL, same type of binding.. you can remove the bindings from a current pair and use the holes on the current ski to make a template for the new ski. Cut a slot in the middle of the template to line up the mark on the ski (mark it on your template). Clamp the template to the new ski lining up the mid sole mark you made from your other ski with the desired mounting point and measure the side to side. I draw a center line front to back down the paper template then center that line on the ski. Tap and drill your holes same as the old ski and screw on the bindings.
 

Frank Ricard

Booting up
Skier
Joined
Jan 11, 2022
Posts
86
Location
AZ
Great write-up OP. Really great. I was searching through the old threads on TGR for a good DIY, but yours is much better and a more exacting method.

I am deciding whether or not to go down this path, and as much as I love every excuse to buy tools (and probably have way too many of them) - I can't decide if I can stomach $250+ in tools if I can find a good shop that I can trust someone at, given how infrequently I am mounting skis.
 

Uncle-A

In the words of Paul Simon "You can call me Al"
Skier
Joined
Dec 22, 2015
Posts
10,961
Location
NJ
Great write-up OP. Really great. I was searching through the old threads on TGR for a good DIY, but yours is much better and a more exacting method.

I am deciding whether or not to go down this path, and as much as I love every excuse to buy tools (and probably have way too many of them) - I can't decide if I can stomach $250+ in tools if I can find a good shop that I can trust someone at, given how infrequently I am mounting skis.
If you are a tool guy you probably have most of the tools you need already and if you don't go to the most expensive tools $250 seems high. My guess is that you don't have the correct tap (#12AB) or a PZ3 tip for your screwdriver other than that you probably have a drill with bits and center punch. DIY is possible for mounting bindings. Good luck.
 

Wade

Out on the slopes
Skier
SkiTalk Supporter
Joined
Nov 19, 2015
Posts
931
Location
New York
Here's a slideshow outlining how I mount bindings with paper templates. I'm not a ski tech so don't take this as a definitive how-to; it's just a procedure that has worked well for me. There's always room for improvement, so if you have suggestions, please offer them up. I like the procedure because there is no measurement involved -- aside from marking the 9.5mm depth on the drill bits. I find it yields a high degree of accuracy: the printer is probably the greatest source of error in the process. As I go through the steps I'll add links to the various tools I find helpful.

If you are considering mounting your own bindings, please be aware of the risk you are undertaking. I recommend practicing several mounts on 2x4s before drilling into the real thing. It's also advisable to take the finished product into the shop for mount and setting verification.

I have used other available templates with success, but I decided to create my own, mostly for the fun of it, but also because I have found it difficult to cut templates to the right boot sole length (BSL) and join the templates together with good alignment. For this reason, I wrote a program to compute hole locations given a binding and BSL, while aligning the two pages is made easier with thin alignment marks that span the full page ensuring a straight template centerline. I also print two templates per set since center punching is destructive. The templates are available on my github. If you don't mind some Haskell programming you can also use the program to do things like compare holes locations of varying bindings, BSLs, and mount points, in case you are considering the optimal placement for a remount:


For this slideshow I'm mounting a pair of Marker Griffons set at 334mm BSL. Here is the corresponding template:


And here it is printed out. Be sure to check correct printer scaling:

View attachment 128536

First trim of the corners of one page right through the two alignment marks:

View attachment 128537

This allow one page to be aligned with the other:

View attachment 128538

When you're satisfied, carefully tape together, front and back:

View attachment 128539

The final template prep requires cutting see-through holes at the intersections of the centerlines and the midsole line. We also need to trim the ends so that the centerlines run right to the edge of the paper:

View attachment 128540

Now get some skis to mount. I came across a brand new pair of 2016 (?) Head Monster 88s still in plastic being sold out of a scuba shop in Tennessee.
(Dear Head, Please bring back the Monster, preferably with the classic non-hammerhead tip. It's one of the best of all time.)

View attachment 128541

Skis mark the suggested mount point in various ways. These Monsters had it on the sidewall:

View attachment 128542

Mark you desired mount point with masking tape. I put Xs on one edge so I don't confuse the right edge with the wrong:

View attachment 128543

Place the template on the skis with the mount point aligned with the midsole line, view through the holes:

View attachment 128544

View attachment 128545

Now place 3-4 layers of tape on the approximate ski centerline where the template edges land. The extra layers of tape prevent the marking gauge from cutting through and defacing your new pair of skis:

View attachment 128546

Mark on the tap where the template edge lands:

View attachment 128547

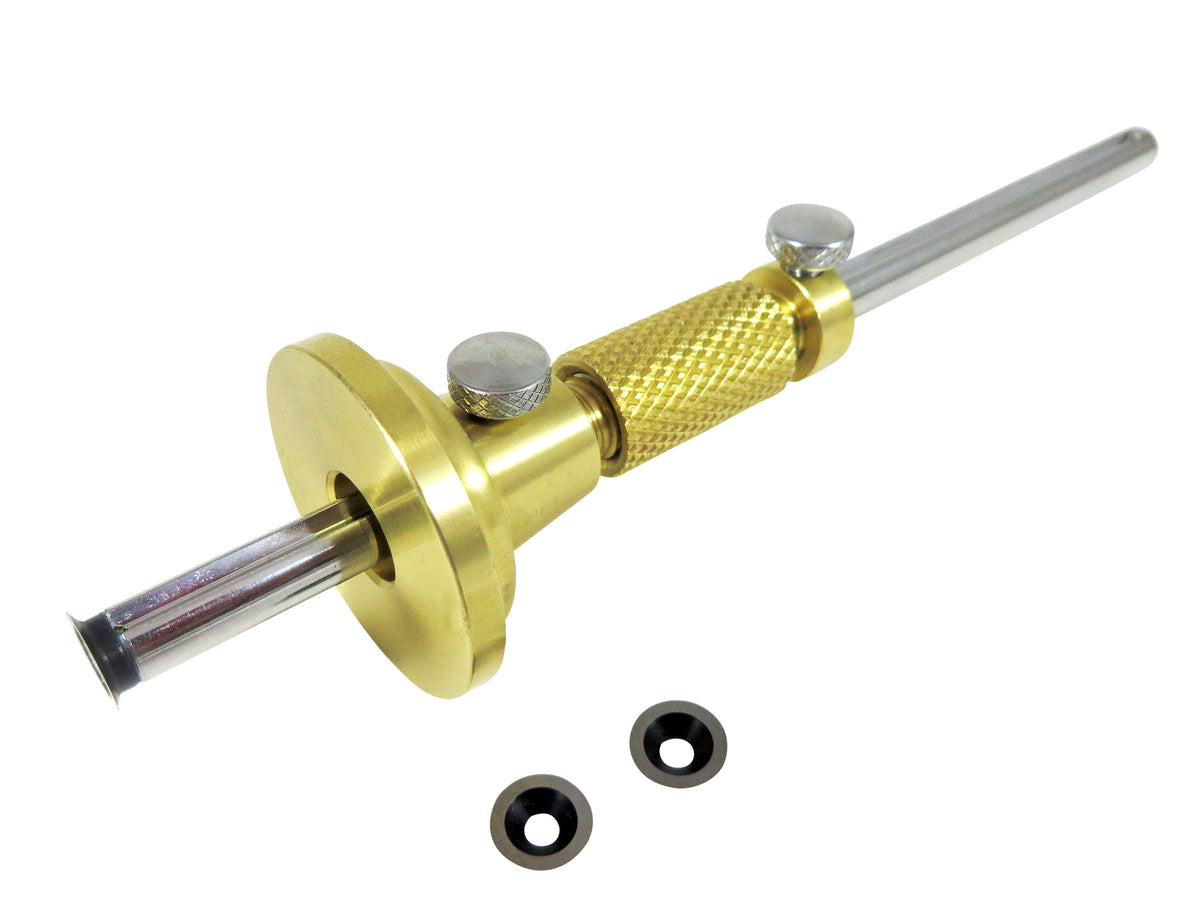
Using a marking gauge, find the center of the ski, repeatedly checking one side and then the other, closing in on the center. I recommend this marking gauge from Lee Valley Tools:


View attachment 128548

Once you have the center, mark the tape using both ski edges. If you have a short turn radius ski, this mark should look like an squashed X, which is okay. With these Monsters (184), it's pretty much a straight line:

View attachment 128549

Now align the template on the ski using the front centerline mark, the rear centerline mark, and the midsole / mount point mark:

View attachment 128550
View attachment 128552
View attachment 128551

Carefully tape the template to the ski. Tape down the see-through hole for better security:

View attachment 128553

Now it is time to center punch. I highly recommend getting an optical center punch: they provide good accuracy and they make you feel like a submarine captain peering through a periscope. I use this one by Fowler:


View attachment 128555

Target in sight:

View attachment 128556

Target acquired!

View attachment 128557

Fire! (Replace the optical eyepiece with the punch and wack it with a hammer.):

View attachment 128558

All marks punched:

View attachment 128559

Remove all the templates and tape:

View attachment 128560
View attachment 128561

Center punching is more than just marks. It dimples the surface allowing a drill bit to find the hole center without wandering. I use a 1/16" bit as a pilot hole:

View attachment 128562

The main bit is 5/32", which is just under the standard 4.1mm and still large enough to be tapped. Mark the correct depth on the bits with tape; in this case, 9.5 mm:

View attachment 128563

Until recently I have hand drilled the pilot and main holes. However, I just got this mini drill press to make the work easier. It's from Grizzly, but it is a Chinese make found under a number of different brands:


View attachment 128564

Set the correct depth for the pilot holes:

View attachment 128565

Drill the pilots. Unlike with a hand drill, I've found that the drill press takes more effort to get good alignment, but once you do, it's much easier to drill:

View attachment 128566

Next set the depth with the main bit and drill. If the ski can slide freely on the table surface, the main bit will automatically find and align with the pilot hole:

View attachment 128567

Holes drilled!

View attachment 128568

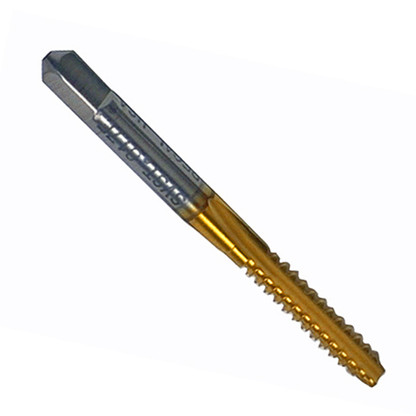
Hole tapping next. I use a tap from Binding Freedom and a long tap wrench from Starrett:


View attachment 128571

With holes tapped, mix and add epoxy:

View attachment 128572

And mount:

View attachment 128573
View attachment 128574

I felt a little bad pulling off this weathered sticker, thinking, is this the last new '16 Monster to be found in the wild?

View attachment 128575

Wait a few hours:

View attachment 128576

Then go ski! (My buddy with Mt Shuksan in the background. The newly mounted Monsters are on my feet.):

View attachment 128577
Bump for this outstanding tutorial. I picked up a marking gauge and an optical center punch. Two excellent tools that reduce the potential for errors when mounting bindings with paper templates.
 
Thread Starter
TS
T

tomahawkins

Making fresh tracks
Skier
SkiTalk Supporter
Joined
Dec 3, 2019
Posts
1,837
Location
Bellingham, WA
An alternative marking gauge with micro adjust:


Yo Momma

Making fresh tracks
Skier
Joined
Mar 29, 2016
Posts
1,789
Location
NEK Vermont
An alternative marking gauge with micro adjust:

Just ordered! I've been using the SlideWright paper marker but getting that midline consistent is the hardest part of the process. So I'm down for hitting the Easy Button! How do you use this tool on skis again?
 
Thread Starter
TS
T

tomahawkins

Making fresh tracks
Skier
SkiTalk Supporter
Joined
Dec 3, 2019
Posts
1,837
Location
Bellingham, WA
Just ordered! I've been using the SlideWright paper marker but getting that midline consistent is the hardest part of the process. So I'm down for hitting the Easy Button! How do you use this tool on skis again?
I ordered one too. Curious how it compares to the Lee Valley tool.

The centering algorithm is here (same thread):


Doug Briggs

"Douche Bag Local"
Industry Insider
SkiTalk Tester
Joined
Nov 9, 2015
Posts
7,543
Location
Breckenridge, CO
One of the most important things in using paper templates, after finding your centerline and marking the ski is ensuring that the drill bit doesn't drift as you drill. If you have a drill press, problem solved. If you don't, then you will want to consider using a punch to create a significant dimple in the topsheet so that the bit won't drift as you drill. Of course, keeping the bit perpendicular to the ski is important, too.

This is the style of centerpunch we use at the shop: https://www.harborfreight.com/sprin..._g4y5Mg1VjwRtjBWH3wXwR02M9zMYk5EaAsMrEALw_wcB
 
Last edited:

Wade

Out on the slopes
Skier
SkiTalk Supporter
Joined
Nov 19, 2015
Posts
931
Location
New York
I finally got around today to using the marking gauge and optical center punch I purchased after the recommendations in this thread. Two excellent tools as it turns out.

I've mounted quite a few bindings using paper templates over the years, and the problems I've run into over time have mostly been around precise centering and marking / drilling precisely where I need to. I've always gotten it to be pretty good, but I've often been out by a millimeter or a degree or two here and there. The culprits have usually been me not getting the centering measurements absolutely perfect over the full length of the mount or punching the template slightly off from the dead center of the mark.

These two tools eliminated those issues completely for me.

The marking gauge and @tomahawkins approach makes finding the center of the ski pretty much fool proof. As an added bonus, the marking gauge can also be used to check your work - after punching the holes I checked each set with the marking gauge to ensue the holes on each side were the same distance from their respective edges. They all were perfect as it turns out, but it was great to be absolutely certain it was right before starting to drill.

The optical center punch was also great. Every punch was in the dead center of the marks on the template and as I mentioned above, I was able to verify that all of the marks were perfect before I started drilling.

After I did my skis first, I had my 12 year old go through the process with me for his skis. I would show him how to do something and then let him do it - occasionally giving some advice or correcting something if needed, but he mostly did great and was able to follow the steps pretty well. He loved the optical center punch! I took care of the drilling and screwed on the bindings, which he was happy to let me do, but he's probably not too far away from being able to do the whole thing. We've got another pair of skis to do together in a week or two.

Anyway, two pairs mounted, millimeter perfect. These tools and this tutorial are both outstanding!
 

Sponsor

Top