-
For more information on how to avoid pop-up ads and still support SkiTalk click HERE.
You are using an out of date browser. It may not display this or other websites correctly.
You should upgrade or use an alternative browser.
You should upgrade or use an alternative browser.
Mexican food...
- Thread starter Tex
- Start date
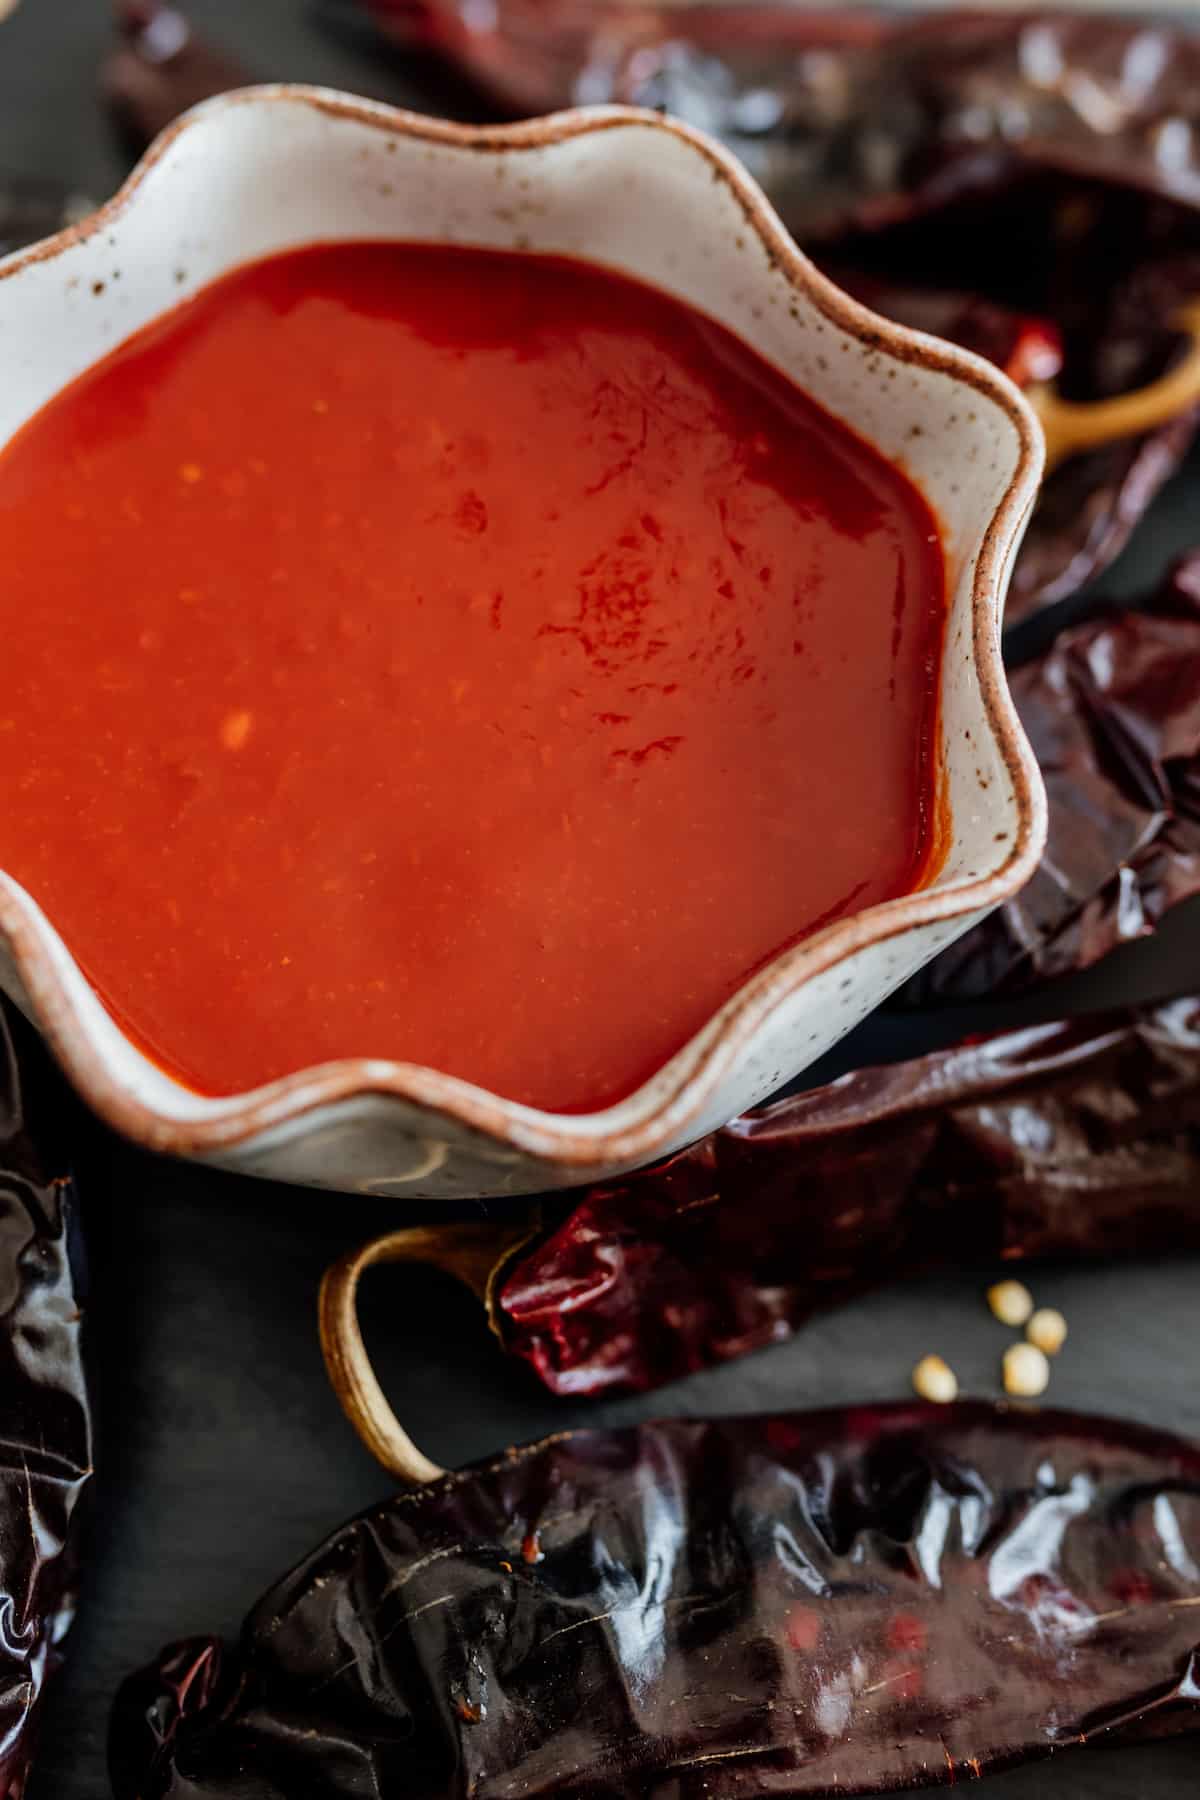
Here are some links to the type of red chile I love and miss. All very similar but slightly different.
https://www.newmexico.org/things-to-do/cuisine/recipes/red-chile-sauce/
 muybuenocookbook.com
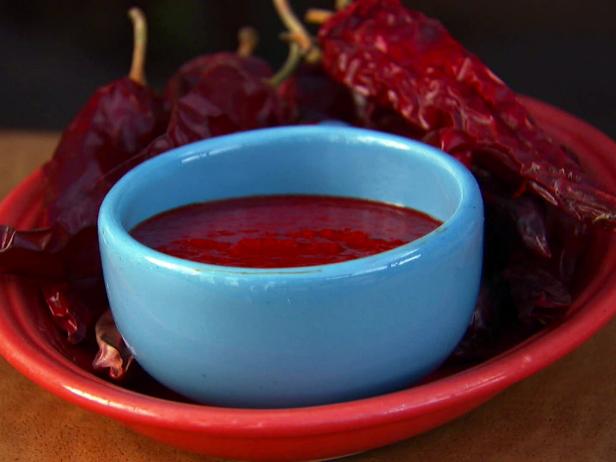
https://www.newmexico.org/things-to-do/cuisine/recipes/red-chile-sauce/
Authentic Red Sauce for Enchiladas
Make authentic Mexican red sauce for enchiladas, stews, soups and more! This homemade enchilada sauce recipe is sure to please everyone.
muybuenocookbook.com

omg there's 3 pp of this?
It looks friggin fantastic.
It looks friggin fantastic.
Thread Starter
TS
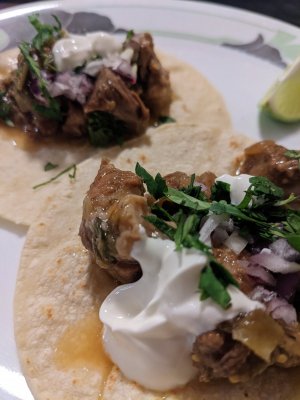
This is dinner tonight, my son cooked this. Chicken thighs Mexican style, he does everything from scratch, red chilies in there. I will get you guys his receipt some time..

pic here I’m going for seconds, the Mexican rice and refried beans he does from scratch. First batch of rice he cooked he threw away, it was not perfect.

pic here I’m going for seconds, the Mexican rice and refried beans he does from scratch. First batch of rice he cooked he threw away, it was not perfect.
I LOVE Mexican food. I have at least a dozen recipes for mole and pipien, and one of my favorites (and the most time consuming) is this one by Rick Bayless. It's totally worth the effort.

 www.seattletimes.com
Rick Bayless’ recipe for state dinner black mole
Chef Rick Bayless shared the recipe for the complicated mole sauce he made at the White House for the state dinner on Wednesday - and it's a doozy.
www.seattletimes.com
- Joined
- Dec 11, 2016
- Posts
- 2,129
I don't recall that happening before. Must've been the haircut. Chef Samson.First batch of rice he cooked he threw away, it was not perfect.
Chili's been mentioned a couple of times, and while it's not Mexican it sure is good. My recipe began with Tolbert's original, which was a good place to start. None of the versions of it I've seen online are quite right, so here's the actual text which I just transcribed from my hardcover copy of his book that my dad gave me:
My version adds a few ingredients which I won't divulge, other than to say it's informed by my love of mole' and that it has no ingredients that a Texas range cook wouldn't have had. The process is also easier, since I have a blender.
Original Texas Chili, from A Bowl of Red, by Frank X. Tolbert.
The “original” was simply bite-size or coarsly ground (half-inch-diameter plate holes is the grinder setting recommended) beef or other mature meats (never, never veal) cooked slowly and for a long time in boon companionship with the pulp of chili peppers, crushed powder from the curly leaves of oregano, ground cuminseeds (comino in Spanish and sometimes so labeled), and chopped garlic cloves.
The first and worst chore of chili making, according to the original formula, is preparing the peppers – in the next chapter there will be a recitation on the history and nature of these passionate vegetables. Ask for sun-dried anchos or a similar type developed by the Japanese, styled “Jap peppers”. You’ll be surprised how easy it is to get these peppers in stores, especially if you live in the western or southern reaches of the nation. In most big cities, too, there are usually Mexican food stores.
For chili with a very “elevated” flavor use four pepper pods for each pound of beef. For mild chili try half as many pods. If you can’t get the pepper pods, chili powder will do handsomely, although it doesn’t impart the same delicate sting as the pepper pods. A heaping tablespoon of chili powder has about the same “power rating” as one average-size chili pepper.
If possible, pick pods of a reddish hue to give the chili its approved coloration. Still, those capsicums may be yellowish, greenish, purplish in maturity and still have the same wild personality as the red ones. If you can’t get red, mix in one level tablespoon of paprika when the pods have been reduced to pulp. The paprika will make the mixture more rosy and won’t affect the taste.
Wash the peppers and remove the stems and seeds. (Don’t touch your eyes during this operation and wash your hands thoroughly afterward.) Boil the pods in a little water for thirty minutes, or until the skins can be removed easily. Then grind, chop, or run through a colander the now skinless, seedless, stemless pods. Save the peppery water in which the pods were boiled. Use it for cooking the chili and for adding water if necessary. Be as conservative as possible on the water unless you want the chili to be soupy.
For this “original” recipe, three pounds of lean beef is the main vehicle. Stewing meat is excellent if it’s fat-free, but never, never use prime beef, for it will turn into mush. The old directions call for an eighth of a pound of rendered beef kidney suet. For this recipe we will make it optional. If you like greasy chili and are under no diet inhibitions, go ahead with the suet. It does add flavor, and the grease can be skimmed off in the final stages of cooking.
Just as in the Pedernales River recipe, sear the three pounds of beef until it is lightly browned. Perhaps you will need a little cooking oil for this operation on the face of the skillet. A big iron skillet, holding at least four quarts, can be used for the whole process except for the searing. Or else you can have ready a pot, preferably an iron one. Into this pot (or the skillet) drop the beef, the optional rendered suet, the pepper pods, and as much of the peppery liquid as you think you’ll need to keep the meat from burning. About two inches of water rising above the beef is usually right. Bring this to a boil and then turn down the heat and simmer for thirty minutes.
Take the pot (or skillet) off the stove. Add 1 level tablespoon of oregano powder (or the curly leaves of oregano), 1 level tablespoon of crushed cuminseeds, 1 level tablespoon of salt, 1 level tablespoon of powdered cayenne pepper, 1 tablespoon of Tabasco sauce, and chopped garlic pods to suit your taste, but at least 2. If yo want to be adventurous and to add more red color – although this wasn’t in the original – pour in 3 level tablespoons of chili powder.
Put the mixture back on the stove and bring it to a boil again, lower the heat, and simmer for 45 minutes, keeping the lid on as much as possible. Stir when necessary, but too much stirring will tear up the meat, especially if the meat is too tender. Add the peppered water only if you think the mixture will burn otherwise.
Take the pot off the stove again. Most contemporary chili makers skim off the grease. The old-timers didn’t, or not all of the grease, anyway. It’s up to you. Personally, I’m antigrease.
Next, mix in 2 heaping tablespoons of Masa Harina. This is Mexican corn meal, made in the ancient Indian way, for tortillas and tamales. You can get instant Masa Harina now in most stores. Instant Masa Harina was developed by Quaker Oats under a commission from the Mexican Government to save its people from making the stuff in the old and arduous Indian way. Masa Harina will not only add a subtle, tamalelike taste, but it will thicken or “tighten” the chili. If Masa Harina isn’t available, settle for ordinary corn meal or wheat flour.
Cook, actually simmer most of the way, for another thirty minutes, or until the meat is done. During this last thirty minutes, do a lot of tasting to see if the seasoning suits you. If it’s not peppery enough – although it certainly should be for most folks – toss in three more chili pods. These final pods have the seeds, stems and skins removed but are not chopped up.
If you’re making chili for the first time or if you’re a tender-mouthed type, you’d better start off with the mild, two-pods-to-a-pound version on the peppers and don’t get reckless and throw in those three whole pods during the last thirty minutes of cooking.
As mentioned before, the olden chili makers had a horror of putting tomatoes and onions into chili. They figured these additions would convert their beloved meat entree into a stew.
My version adds a few ingredients which I won't divulge, other than to say it's informed by my love of mole' and that it has no ingredients that a Texas range cook wouldn't have had. The process is also easier, since I have a blender.
You’re killing me. Mexican food is my favorite!Updated photos, masterchef at work..He has been on this kick of mexican style chicken and beans...You can do all kinds of dishes with that...
View attachment 145996
View attachment 145997
View attachment 145998
View attachment 145999
View attachment 146000
View attachment 146001
Thread Starter
TS
My daughter just brought me this dish while I'm here reading this forum, shrimp tacos, and the shells she fried herself, and her guacamole sauce ...oh man I'm just living the dream you guys...

Last edited:
Thread Starter
TS
My son made Birria Tacos last night. You can google that. I feel bad because this morning I was kinda grumpy and gave him an earful that he needs to cool it on the cooking and focus on studying, this cooking kick is just a distraction to not study, because he spends all day on it!! Then he says “Dad, it’s spring break.” I’m lucky I have a kid that wants to cook on spring break and not go to South Beach.


Thread Starter
TS
I might have already posted this, but is my son's simple margarita rocks recipe, and trust me, it will be the best margarita on the rocks you ever had. For parts you can use a shot glass, or any bigger glass, so very easy to scale..

Sponsor
Members online
- Andy Mink
- Mel
- Chewski
- applecart
- Wade
- Noodler
- Mallet21
- wnyskier
- javierfndz
- Wasatchman
- cosmoliu
- Philpug
- AUdicky
- PaganSkier
- dan ross
- GregK
- davjr96
- Doug Briggs
- Chris V.
- Vampire Cat
- aveski
- Ryan Perham
- KimJongTr1ll
- Squawskier
- AltaSkier
- wgo
- no edge
- arildGFB
- robertc3
- Jerez
- Ivanphh
- Ivanrcy
- Marker
- textrovert
- Kyle
- blackke17
- John O
- Jms990
- nnowak
- mikes781
- JoeSchmoe
- HardDaysNight
- PlainsSkier
- BLiP
- anders_nor
- Rc231
- Norther1
- GCRUMP
- JibingDownhill
- SpeedyKevin
Total: 3,552 (members: 146, guests: 2,284,robots: 1,122)